3.1 KiB

Taiko Drum Controller - Arduino
Open-source hardware program to make your own Taiko no Tatsujin PC controller.
About this Project
This project aims to help you develop your own hardware taiko at home.
This program is for personal and non-commercial use only.
What You Need
-
An Arduino Micro or Leonardo microcontroller (other compatible boards might work, but you need to verify that they support keyboard emulation);
-
4 Piezoelectric sensors;
-
Necessary electronic components (breadboards, resistors, LEDs, jumper wires, etc.);
-
Wood planks and cutting tools if you need to make your drum from scratch. If you have a aftermarket taiko or a Big Power Lv. 5 drum, you can use them directly.
Steps to Make the Controller
-
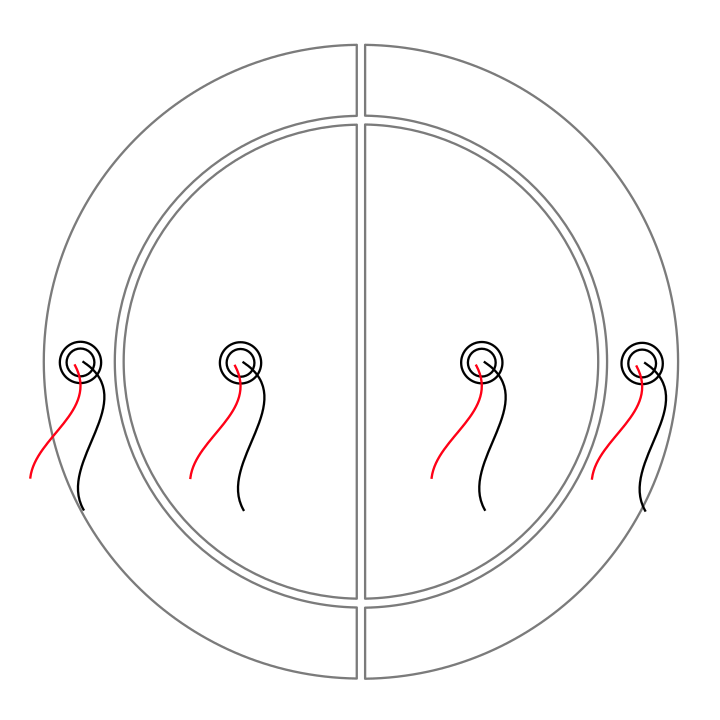
Make the drum and firmly glue the 4 piezoelectric sensors to the drum. Refer to the image for preferred locations of the sensors.
-
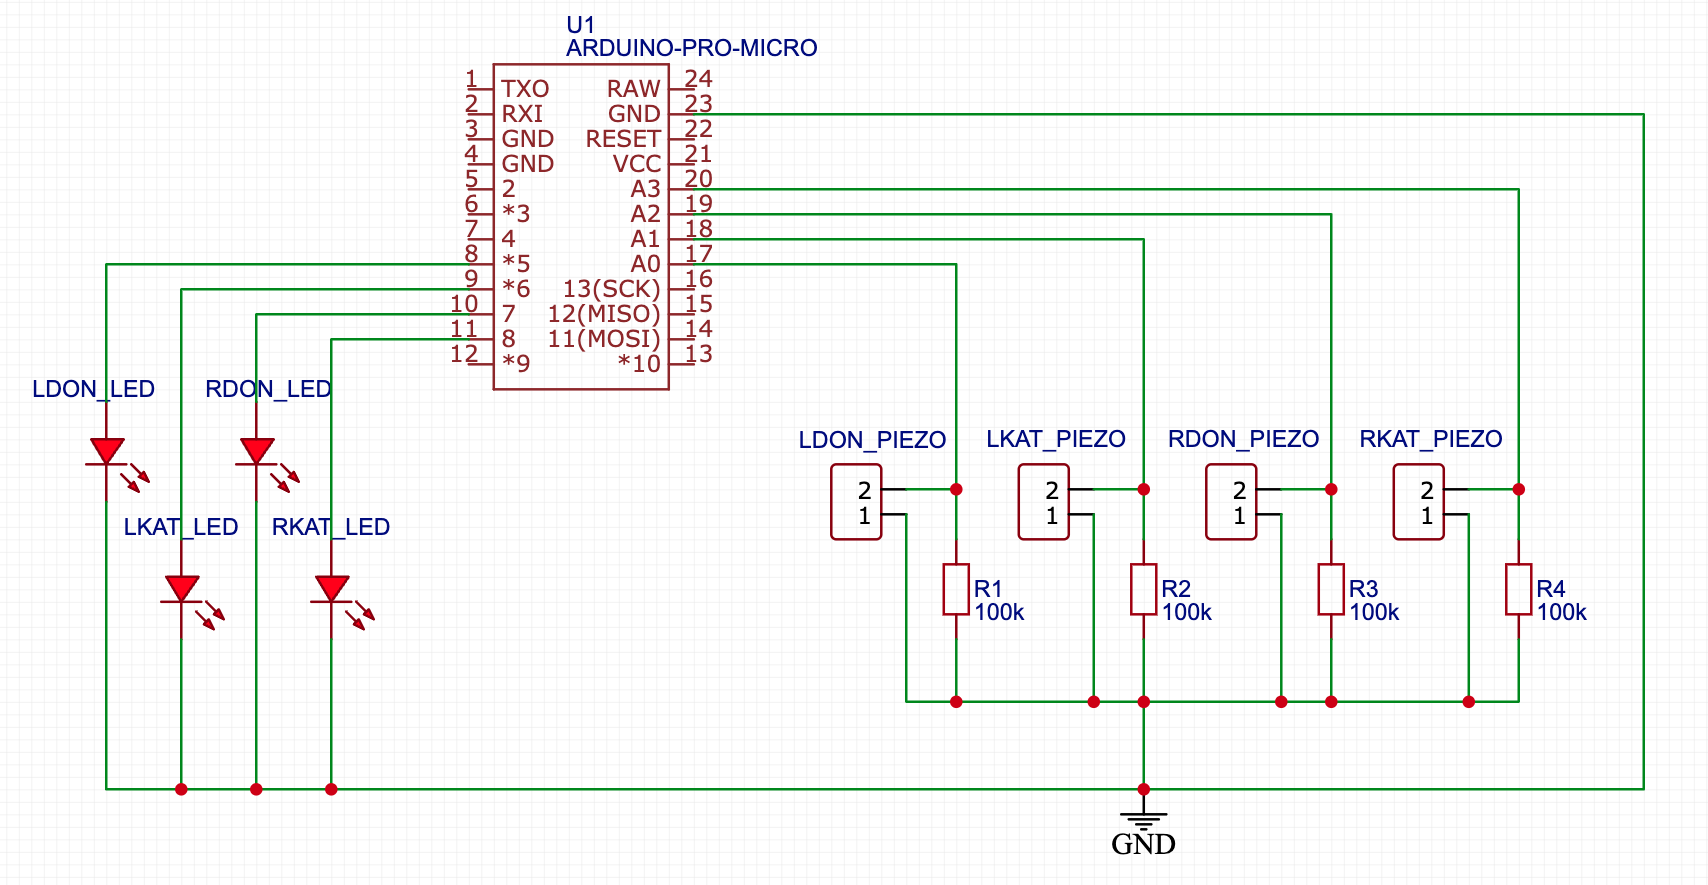
Connect the piezoelectric sensors and other components to the controller as follows (the polarity of the piezoelectric sensors don't matter);
-
Flash the firmware to the board.
You may need to fine-tune some parameters like
SAMPLE_CACHE_LENGTH,HIT_THRES,RESET_THRES, andsensitivity. See the following section for details. -
Have fun!
Tuning the Parameters
-
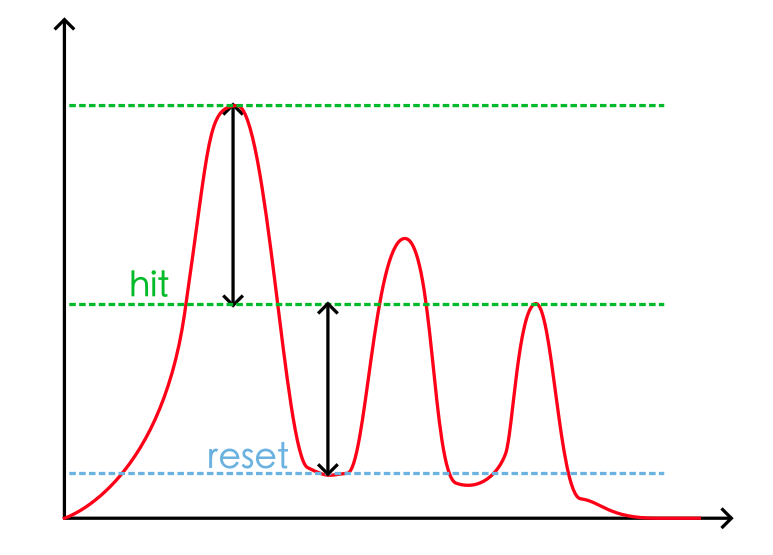
Hit and reset threshold
Set
DEBUG 1(this disables the keyboard output and sends signal values from the serial port), flash the firmware, roll on one of the 4 areas of the drum, and visualize the graph from the output of the serial monitor. The hit threshold should be smaller than your heaviest hit on the drum, and the reset threshold should be greater than the trough between roll hits. The reset value should also below the hit value.Repeat the process for the rest 3 areas and find the best one that fits all.
-
Sampling length
For maximum runtime speed, the
cache.hlibrary has been optimized to work withSAMPLE_CACHE_LENGTHwindow sizes of powers of 2. That means 2, 8, 16, and 32, etc. Practically 16 is the best value for Arduino, but if you have a powerful microcontroller that samples the input at the speed of at least 4000Hz or more, you can change the value to 32 for a smoother (in other words, less noisy) curve. -
Sensitivities
Not all piezoelectric sensors are the same, and due to installation errors, the captured signals from the 4 sensors may vary significantly. The sensitivity values are multipliers to normalize the differences. In the following example, the right-don area generates a much higher value than the rest 3, so you can adjust
sensitivityto{1.0, 1.0, 0.5, 1.0}to eliminate the issue.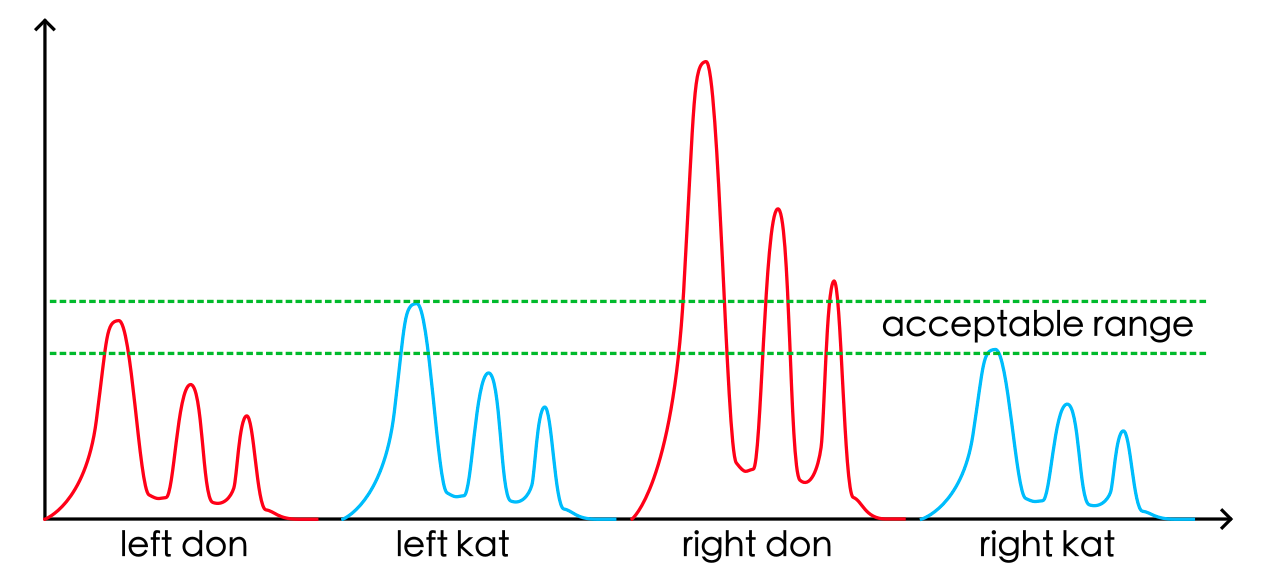
Note that the installation of the sensors is very critical. You should make sure that the sensors are firmly attached on the wood and located properly.