mirror of
https://github.com/whowechina/popn_pico.git
synced 2025-02-25 22:38:16 +01:00
Pico Popn - Pop'n Music Controller


Features:
- It's tiny.
- 1000Hz polling rate.
- HID lights (9 button lights and Logo RGB).
- RGB rainbow effects.
- So far, it only supports Gamepad mode.
Thanks to:
- SpeedyPotato, for his great SDVX pico project which inspired me in the first place. I also got many materials from his repo. Check out his great projects: https://github.com/speedypotato.
- CrazyRedMachine, I got panel arts from his SVG files: https://github.com/CrazyRedMachine/PopnPanel.
- Many respectful guys/companies who made their tools or materials free or open source (KiCad, OpenSCAD, InkScape, Raspberry things).
HOW TO BUILD
Step 1 - Buy
-
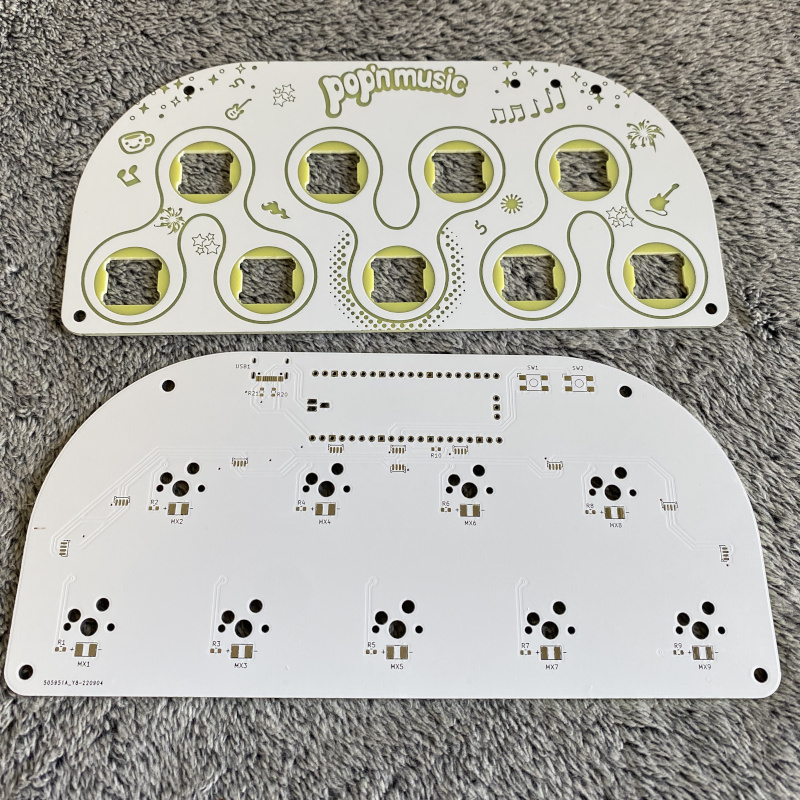
Place order at jlcpcb.com for PCB and plate. Gerber zip files are /PRODUCTION/PCB.zip and /PRODUCTION/PLATE.zip. Leave everything default in JLC's ordering page (board thickness is 1.6mm). Choose what ever color you like, I prefer white.
-
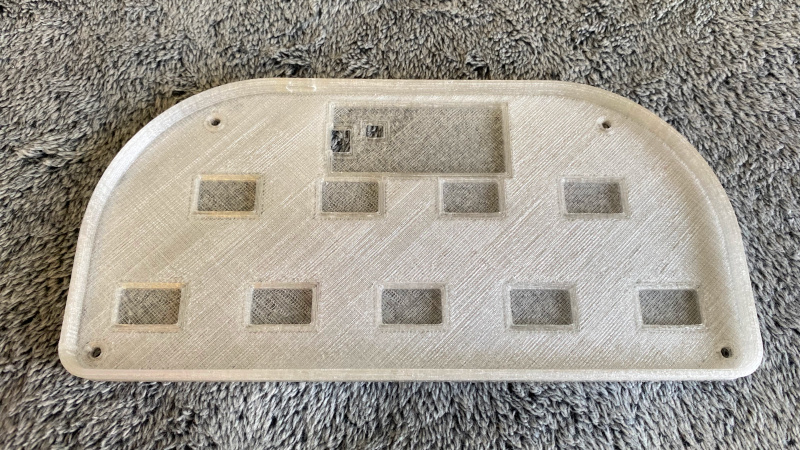
Order 3D printing service for the case, FDM with transparent PETG filament or SLA with half-transparent resin. If you own a 3D printer, do it yourself. The file is /PRODUCTION/pico_popn_case.stl.
-
Buy other components (get few more for tolerance):
- 1 * Raspberry Pi Pico (https://www.raspberrypi.com/products/raspberry-pi-pico/)
- 9 * Gateron Hotswap Sockets (https://www.gateron.co/products/gateron-hot-swap-pcb-socket)
- 9 * Gateron 3.4mm-travel switches (I prefer Box CJ Switch, https://www.keychron.com/products/gateron-box-cj-switch)
- 1 * USB Type-C socket (918-418K2023S40001 or KH-TYPE-C-16P)
- 10 * WS2812B-4020 side-facing RGB LEDs
- 9 * 2835 white LEDs (0.2W or 0.5W)
- 10 * 0603 220ohm resistors
- 2 * 0603 5.1kohm resistors
- 2 * Tactile Switches (4.5x4.5x6.5mm or 4.5x4.5x7mm or KAN4542-0701C)
- 4 * set of M3 screws/nuts/spacers (I'll explain later)
- 9 * Keycaps (many choices I'll explain later)
Step 2 - Solder
- Use the smallest soldering iron tip you have.
- Use solder flux, always keep the pins "wet".
- Soldering iron temperature set to around 300°C.
- Use tweezers to hold components.
- Tricks for Type-C socket and 4020 RGB LEDs.
- Put flux on all those small pins. Melt a tiny little bit solder (seriously very very little bit) at the iron tip. Then quickly solder the pins. Flux and very little bit solder is the key.
- 2 resistors near USB socket are 5.1k ohm, others are all 220ohm.
- Don't forget to solder 3 "holes" which connects to the Raspberry Pi Pico's USB pins.
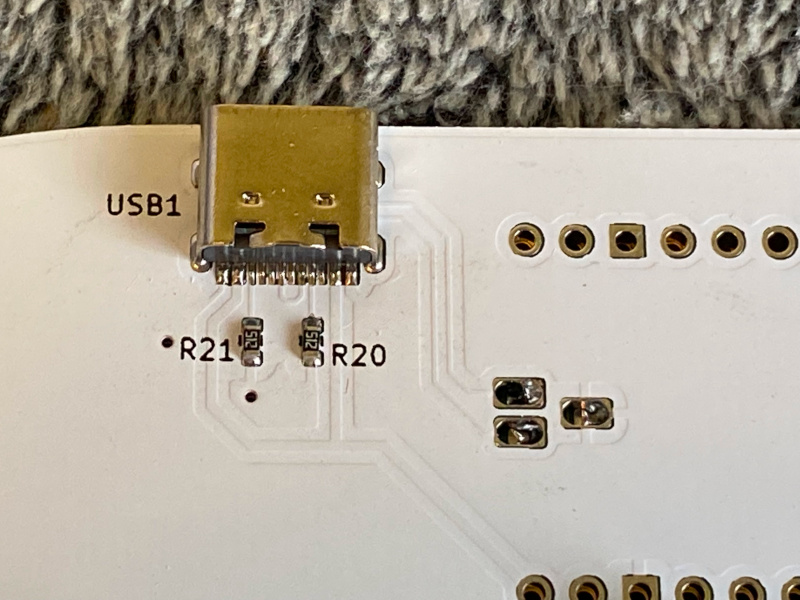
- 4020 RGB LEDs are side-facing, don't make it "up-facing".

- They look like this when finish:


Step 3 - Firmware
- Use a USB cable to connect the PCB to a PC/Mac computer while pressing down the small button on Raspberry Pi Pico. An explorer window will pop up. If it doesn't show up, navigate to a disk labeled "RPI-RP2".

- Drag the UF2 file (/PRODUCTION/pico_popn.uf2) to the root of this new disk.
- The RGB lights will start rainbow effects.
- If it's not working, go back to Step 2 and fix it.
Step 4 - Assembly
- Insert 9 key switches into the plate, be careful, don't bend the leads.

- Put the PCB into the case.
- Gap between the plate and the PCB is about 3.4mm. There're many ways to fix and fasten boards and case. Here's my solution, I reprocessed the screws and spacers as they didn't come with proper length.


- Another way is to use a long M3 screw from top side and a nut at the bottom side. Between PCB and plate, use a 3.5mm length M3 spacer with no threads. You can also 3D print some spacers using provided /PRODUCTION/screw_spacer.stl.
- Don't forget get some anti-slip silicone pads.

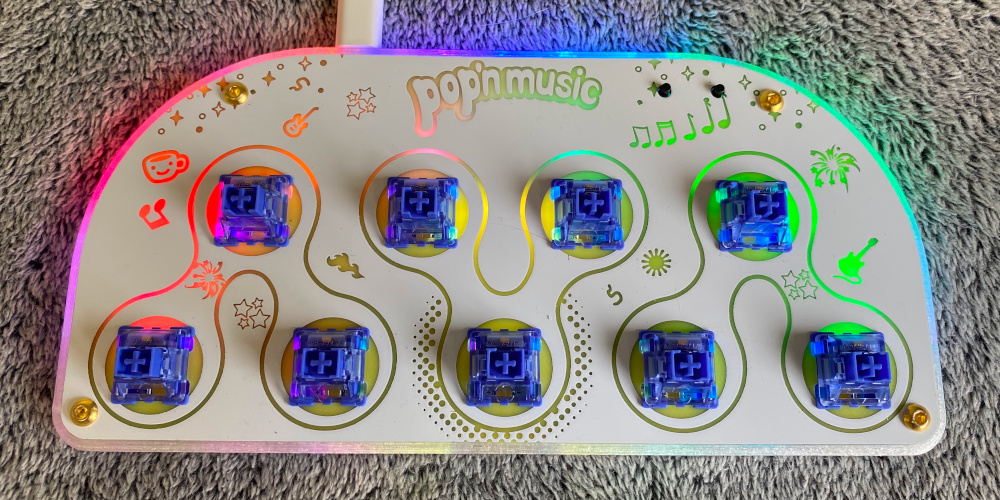
- Almost done.

Step 5 - Keycaps
- If you have resin printer, you can make them by yourself.
- Make half-transparent resin by mixing translucent and white resin (5:1) as the base resin.
- Mix some drops of UV resin pigment, you can make all Pop'n Music button colors.

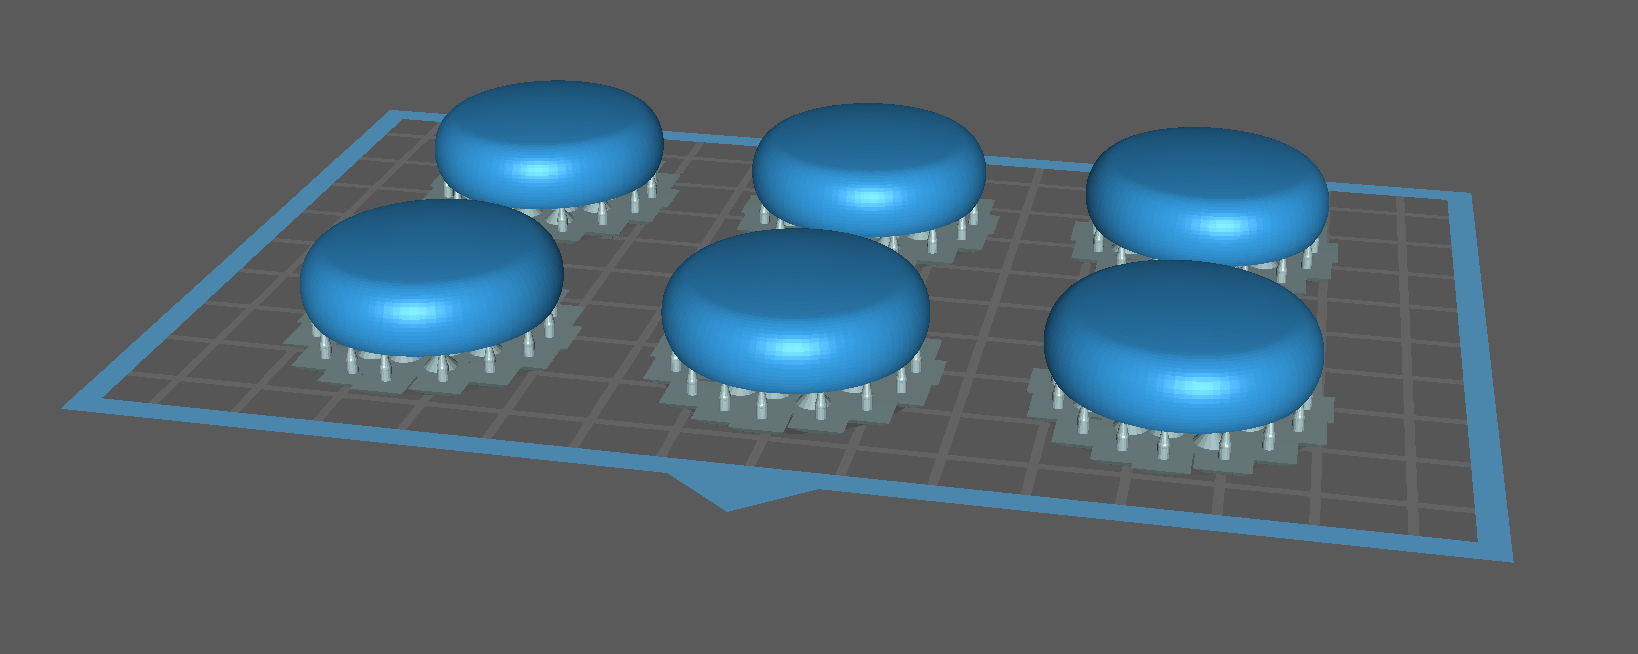
- 3D file is /PRODUCTION/popn_keycap.stl or if you're using Chitubox - /PRODUCTION/popn_keycaps.chitubox. Orientation and support should be like this to get perfect button surface.
- There're many other choices.
- Homemade bottle cover keycaps
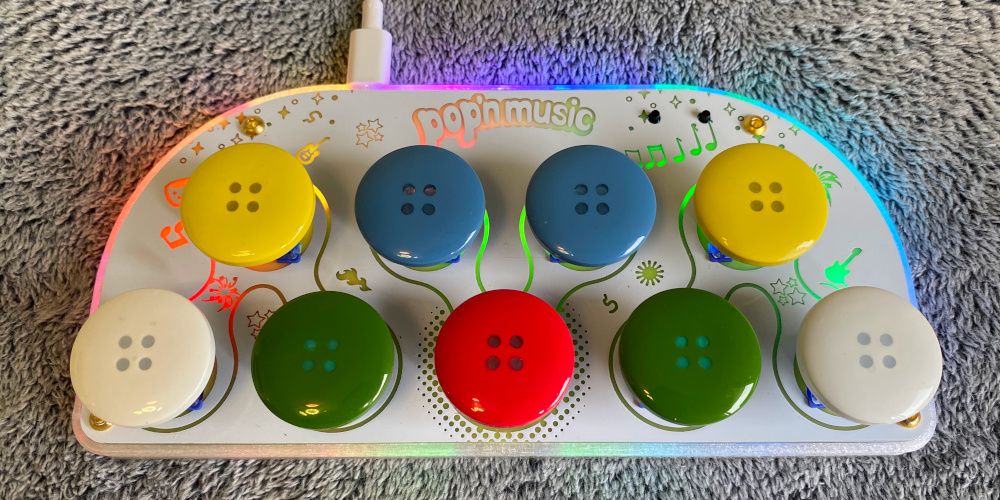
- Homemade coat buttons keycaps
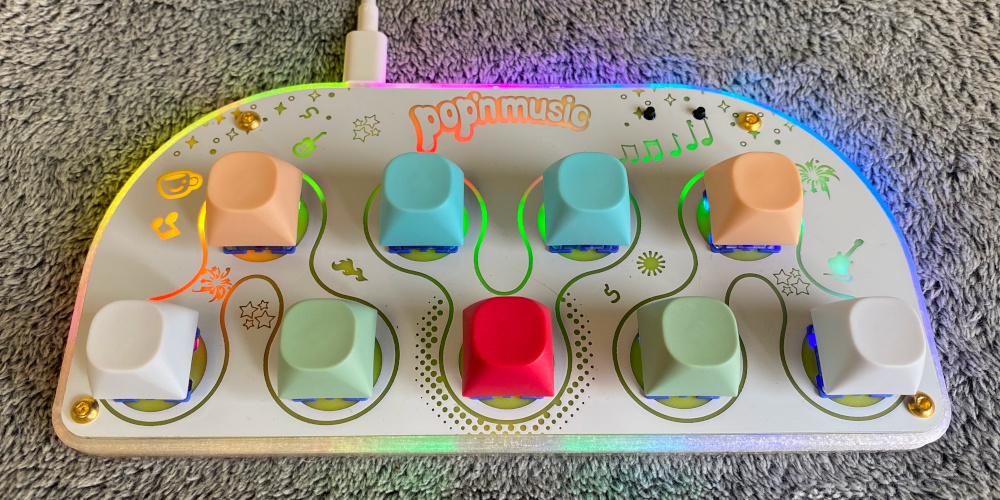
- DSA color keycaps

- DSA transparent keycaps

- MA color keycaps
- XDA 1.5U color keycaps

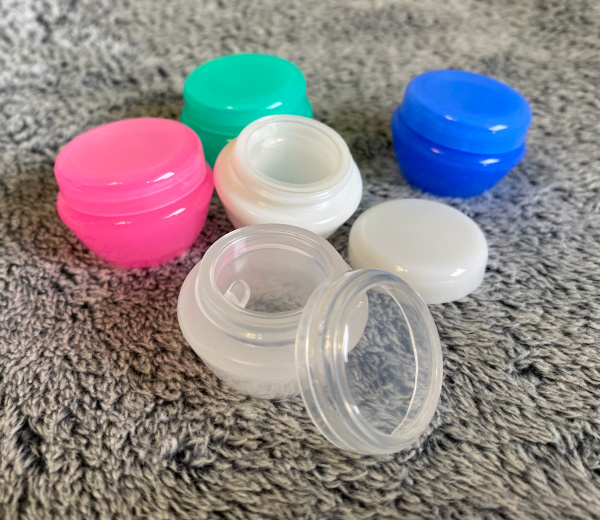
- About the homemade process.
- I bought these inexpensive 3gram/5gram distribution bottles just to get the covers (28-30mm diameter).
- Cut the shaft/socket out of regular transparent keycaps.
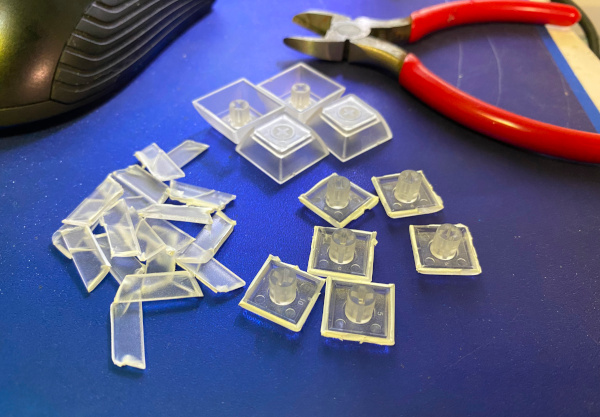
- Drill some holes on them so later we can apply UV resin better.

- Apply UV resin, glue the socket and the cover together.


- Don't forget alignment.

- After cured by UV light, they look like this:

- Homemade bottle cover keycaps