8.9 KiB
Getting started
Installation
Installing MkDocs
Before installing MkDocs, you need to make sure you have Python and pip
– the Python package manager – up and running. Assuming you are a developer and
have a basic understanding of how things work and what StackOverflow is, we
won't provide guidelines on setting those up. You can verify if you're already
good to go with the following commands:
python --version
# Python 2.7.2
pip --version
# pip 1.5.2
Installing and verifying MkDocs is as simple as:
pip install mkdocs && mkdocs --version
# mkdocs, version 0.15.2
Installing Material
Next, assuming you have MkDocs up and running mkdocs-material can be
installed with pip:
pip install mkdocs-material
Usage
If you haven't already done it, creating a new documentation project is really simple in MkDocs:
mkdocs new my-project
cd my-project
MkDocs will create the necessary files and base directory structure inside the
folder my-project. In order to enable the theme just add the following line
to the auto-generated mkdocs.yml:
theme: 'material'
If your project is hosted on GitHub, add the repository link to the
configuration. If the repo_name equals GitHub, the Material theme will
add a download and star button, and display the number of stars:
repo_name: 'GitHub'
repo_url: 'https://github.com/my-github-handle/my-project'
MkDocs includes a development server, so you can view your changes as you go - very handy. Spin it up with the following command:
mkdocs serve
Now you can go to localhost:8000 and the Material theme should be visible. You can now start writing your documentation, or read on and customize the theme through some options.
Options
The Material theme adds some extra variables for configuration via your
project's mkdocs.yml. See the following section for all available options.
Adding a version
In order to add the current version next to the project banner inside the
drawer, you can set the variable extra.version:
extra:
  version: '0.1.0'
This will also change the link behind the download button to point to the archive with the respective version on GitHub, assuming a release tagged with this exact version identifier.
Adding a logo
If your project has a logo, you can add it to the drawer/navigation by defining
the variable extra.logo. Ideally, the image of your logo should have
rectangular shape with a minimum resolution of 128x128 and leave some room
towards the edges. The logo will also be used as a web application icon on iOS.
Simply create the folder docs/images, add your image and reference it via:
extra:
  logo: 'images/logo.png'
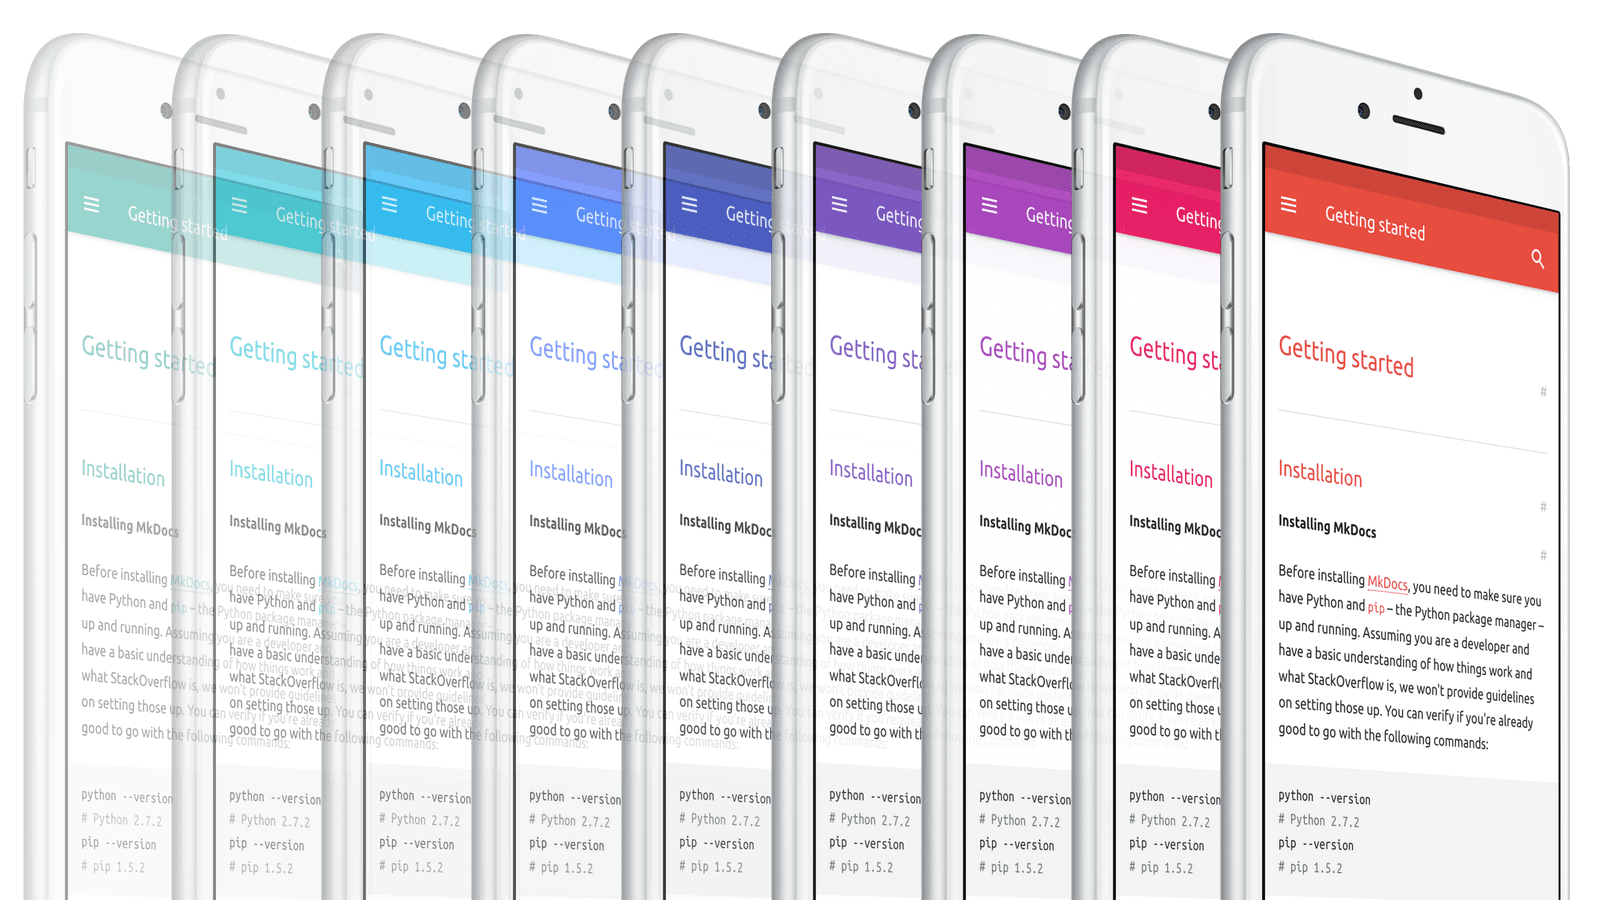
Changing the color palette
Material defines a default hue for every primary and accent color on Google's
material design color palette. This makes it very easy to change the
overall look of the theme. Just set the variables extra.palette.primary and
extra.palette.accent to one of the colors defined in the palette:
extra:
  palette:
    primary: 'indigo'
    accent: 'light blue'
Color names can be written upper- or lowercase but must match the names of the material design color palette. Valid values are: red, pink, purple, deep purple, indigo, blue, light blue, cyan, teal, green, light green, lime, yellow, amber, orange, deep orange, brown, grey and blue grey. The last three colors can only be used as a primary color.
If the color is set via this configuration, an additional CSS file called
palettes.css is included that defines the color palettes. If you want to
keep things lean, clone the repository and recompile the theme with your
custom colors set. See this article for more information.
Changing the font family
Material uses the Ubuntu font family by default, specifically the regular sans-serif type for text and the monospaced type for code. Both fonts are loaded from Google Fonts and can be easily changed to other fonts, like for example Google's own Roboto font:
extra:
  font:
    text: 'Roboto'
    code: 'Roboto Mono'
The text font will be loaded in font-weights 400 and 700, the monospaced
font in regular weight. If you want to load fonts from other destinations or
don't want to use the Google Fonts loading magic, just set extra.font to
'none':
extra:
  font: 'none'
Localization
The Previous and Next labels in the footer can easily be changed by
defining the variables extra.i18n.prev and extra.i18n.next:
extra:
  i18n:
    prev: 'Previous'
    next: 'Next'
Adding a GitHub and Twitter account
If you have a GitHub and/or Twitter account, you can add links to your
accounts to the drawer by setting the variables extra.author.github and
extra.author.twitter respectively:
extra:
  author:
    github: 'my-github-handle'
    twitter: 'my-twitter-handle'
Google Analytics integration
Material makes it easy to integrate site tracking with Google Analytics.
Besides basic tracking, clicks on all outgoing links can be tracked, clicks on
the download and star button, as well as how site search is used. Tracking can
be activated in your project's mkdocs.yml:
google_analytics:
  - 'UA-XXXXXXXX-X'
  - 'auto'
More advanced customization
If you want to change the general appearance of the Material theme, see this article for more information on advanced customization.
Extensions
MkDocs supports several Markdown extensions. The following extensions are not enabled by default (see the link for which are enabled by default), so you have to switch them on explicitly.
CodeHilite (recommended)
This extensions uses Pygments (install with pip install pygments) to add
code highlighting to fenced code blocks. It might not be the best code
highlighter, but it works without JavaScript and on the server:
markdown_extensions:
  - codehilite(css_class=code)
If you want more extensive highlighting, you can use a JavaScript library like highlight.js, which is not included in Material. See this link for further instructions
Permalinks
In order to add permalinks to the headers of your article, set the
markdown_extensions.toc.permalink variable to a symbol, e.g. #:
markdown_extensions:
  - toc:
    permalink: '#'
The symbol can be chosen freely, it can even be a WebFont icon.
Admonition
Admonition is a handy extension that adds block-styled side content to your
documentation, for example hints, notes or warnings. It can be enabled by
setting the variable markdown_extensions.admonition:
markdown_extensions:
  - admonition
In order to add a note, use the following syntax inside your article:
!!! note
    Nothing to see here, move along.
This will print the following block:
!!! note Nothing to see here, move along.
The Material template adds a neutral color for the note class and a red color
for the warning class. You can also add a custom title:
!!! warning "Don't try this at home"
    If you do, you will regret it.
This will print:
!!! warning "Don't try this at home" If you do, you will regret it.
More colors can be freely defined.
Full example
Below is a full example configuration for a mkdocs.yml:
# Project information
site_name: 'My Project'
site_description: 'A short description of my project'
site_author: 'John Doe'
site_url: 'https://my-github-handle.github.io/my-project'

# Repository
repo_name: 'GitHub'
repo_url: 'https://github.com/my-github-handle/my-project'

# Copyright
copyright: 'Copyright (c) 2016 John Doe'

# Documentation and theme
docs_dir: 'docs'
theme: 'material'

# Options
extra:
  version: '0.1.0'
  logo: 'images/logo.png'
  palette:
    primary: 'indigo'
    accent: 'light blue'
  font:
    text: 'Roboto'
    code: 'Roboto Mono'
  i18n:
    prev: 'Previous'
    next: 'Next'
  author:
    github: 'my-github-handle'
    twitter: 'my-twitter-handle'

# Google Analytics
google_analytics:
  - 'UA-XXXXXXXX-X'
  - 'auto'

# Extensions
markdown_extensions:
  - codehilite(css_class=code)
  - admonition
  - toc:
      permalink: '#'